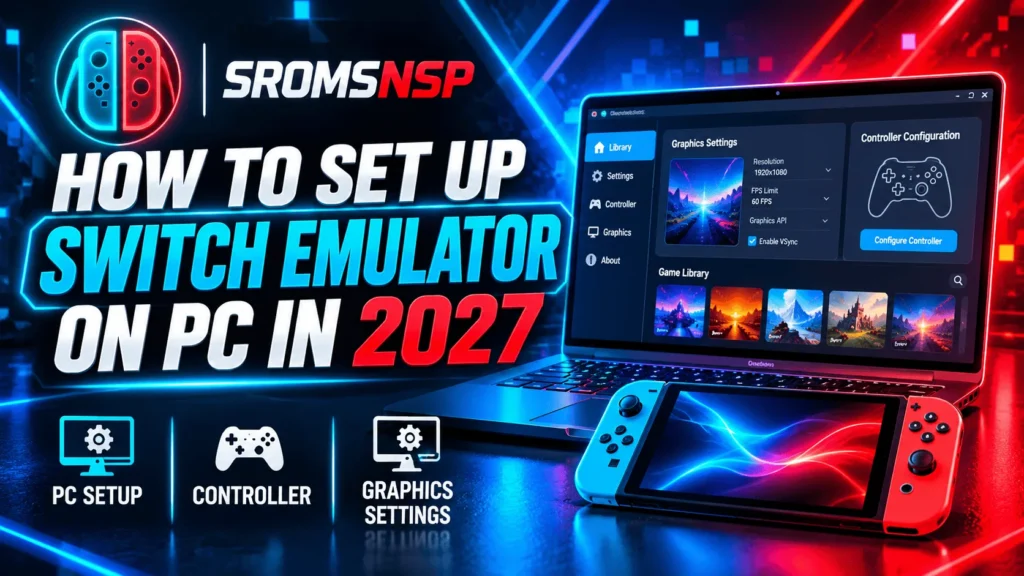
Want to understand how to set up a Nintendo Switch emulator on your Windows PC? Emulation allows compatible computers to reproduce parts of the Nintendo Switch environment, giving users access to configurable graphics, controller options, and a larger display.
However, setting up an emulator involves more than downloading an application. You should first check your PC specifications, obtain the emulator from its legitimate project source, prepare the required files that you are legally entitled to use, and configure your controller and graphics settings.
In this beginner-friendly guide, we explain the general setup process, important configuration options, and solutions to common problems. Menu names and available features may differ depending on the emulator and its version.
What You Need Before Setting Up an Emulator
Before starting, prepare the following:
- A compatible 64-bit Windows PC.
- A modern processor and supported graphics card.
- Updated graphics drivers.
- Enough free storage space.
- A compatible controller or keyboard.
- A legitimate emulator installation.
- Any required system files and game backups that you are legally entitled to use.
Some emulators require additional system components. Follow the installation instructions published by your selected project’s official documentation.
Step 1: Check Your PC Specifications
Nintendo Switch emulation can be demanding, so checking your hardware before installation is important.
Here are general PC specifications to consider:
| Component | Suggested Starting Point |
|---|---|
| Operating System | Windows 10 or Windows 11 64-bit |
| Processor | Modern Intel or AMD 64-bit CPU |
| RAM | 16 GB recommended |
| Graphics Card | GPU supporting a compatible graphics API |
| Storage | SSD recommended |
| Graphics Drivers | Latest compatible manufacturer drivers |
These are general recommendations rather than guaranteed requirements. Individual emulators and games can have different hardware requirements.
Why Does Your Processor Matter?
The processor handles many of the tasks involved in emulation. A CPU with good single-core performance can help reduce bottlenecks and improve consistency.
Why Is a Dedicated Graphics Card Helpful?
A dedicated GPU can provide more graphics-processing resources than many integrated graphics solutions. However, actual results depend on the emulator, graphics drivers, and game.
Step 2: Choose a Nintendo Switch Emulator
There are multiple projects associated with Nintendo Switch emulation. Their development status, Windows support, and compatibility can change over time.
Some names you may encounter include:
Eden
Eden is an open-source Nintendo Switch emulator project with builds for several platforms, including Windows. Its official project documentation and release information are useful starting points for installation and compatibility checks.
Ryubing
Ryubing is a community project derived from the Ryujinx code lineage. Its documentation covers installation, controller configuration, graphics settings, and other setup topics.
Which One Should You Choose?
Before choosing, compare:
- Current Windows build availability.
- Official installation instructions.
- Hardware requirements.
- Graphics API support.
- Controller compatibility.
- Recent development activity.
Avoid downloading installers from unknown websites or third-party download pages that do not clearly identify the original project.
Step 3: Download the Emulator Safely
Once you have selected a project:
- Visit its official project website or repository.
- Open the releases or download section.
- Read the requirements for Windows.
- Choose the appropriate build for your computer.
- Download the release from the project’s verified source.
- Check the installation instructions before running it.
Some emulator releases are distributed as ZIP archives rather than traditional Windows installers.
If you download an archive, extract it to a folder where your Windows account has permission to run and update applications.
Security Tip: Avoid unofficial repackaged installers, suspicious download managers, password-protected archives from unknown sources, and files that ask you to disable antivirus protection.
Step 4: Install and Open the Emulator
The exact installation process depends on the project.
For a typical portable Windows release:
- Locate the downloaded archive.
- Right-click it and select Extract All.
- Choose a suitable folder.
- Open the extracted directory.
- Run the emulator executable.
- Follow any legitimate prerequisite or first-launch prompts.
Some projects may require an additional Microsoft runtime or other Windows component. Install only the dependencies specified in the official documentation.
If Windows displays a security warning, verify that the file came from the legitimate project source before deciding whether to run it.
Step 5: Prepare Required System Files
Some Nintendo Switch emulators require additional system files to operate.
Depending on the project, these may include:
- Decryption keys.
- Firmware files.
- Other system data required by the emulator.
These files are not necessarily included with the emulator application.
Only use files that you are legally entitled to obtain and use. Consult the emulator’s official documentation for its requirements and supported file formats.
Do not download copyrighted firmware, encryption keys, or other proprietary system files from unauthorized websites. This guide does not provide instructions for bypassing console security or obtaining protected files.
Step 6: Add Your Game Library
After completing the requirements documented by your emulator, you may be able to add a folder containing your legally obtained game backups.
A typical process looks like this:
- Create a dedicated folder for your game backups.
- Open the emulator.
- Find its game-directory or library settings.
- Select the folder containing your files.
- Save the configuration.
- Allow the emulator to scan the directory.
Some projects support formats such as NSP and XCI, but supported formats depend on the application and version.
If a game does not appear, check its file format, folder location, and the emulator’s documentation.
Step 7: Configure Your Controller
A controller can make many games more comfortable to use than a keyboard.
Many emulators provide input configuration for compatible devices.
A general controller setup process is:
- Connect your controller using USB or Bluetooth.
- Confirm that Windows recognizes it.
- Open your emulator’s input or controller settings.
- Select the connected input device.
- Choose the appropriate controller layout.
- Test the buttons and analog sticks.
- Save your configuration.
Controller Button Mapping
A typical Nintendo-style layout uses the following controls:
| Nintendo Button | Common Controller Equivalent |
|---|---|
| A | Right face button |
| B | Bottom face button |
| X | Top face button |
| Y | Left face button |
| L | Left shoulder button |
| R | Right shoulder button |
| ZL | Left trigger |
| ZR | Right trigger |
| Plus | Start |
| Minus | Select |
Button names and physical positions may differ between controller brands. Check the emulator’s input preview to confirm the mapping.
What If Your Controller Is Not Detected?
Try these steps:
- Reconnect the controller.
- Test another USB port.
- Check Bluetooth pairing.
- Update the controller’s drivers if required.
- Close other applications that may be capturing controller input.
- Restart the emulator after connecting the device.
Step 8: Configure Graphics Settings
Graphics settings can affect image quality, compatibility, and performance.
For your first test, it is usually best to keep the emulator’s default settings. Change one option at a time if you encounter a problem.
| Setting | What It Does |
|---|---|
| Graphics API | Selects the rendering interface |
| Resolution Scale | Changes internal rendering resolution |
| VSync | Helps synchronize frames with display refresh |
| Shader Cache | Stores compiled shader data where supported |
| Anisotropic Filtering | Can improve texture clarity |
| Aspect Ratio | Controls the displayed image proportions |
Vulkan or OpenGL?
Some emulators support Vulkan, OpenGL, or both.
The best option depends on your GPU, drivers, emulator, and individual game. If the default graphics API causes problems, consult the project’s documentation before testing an alternative.
Resolution Scaling
Higher resolution scaling can improve image sharpness, but it also increases GPU workload.
Start with the default or native resolution. If the game runs smoothly, you can experiment with higher scaling levels.
If performance becomes worse, return to the previous setting.
Step 9: Test Your Configuration
Before changing advanced settings, test a game that you are legally entitled to use.
During the test, check:
- Does the game launch successfully?
- Are the graphics displayed correctly?
- Does the controller respond?
- Is the audio working?
- Is the performance consistent?
- Does the emulator report any errors?
Some games may require additional configuration, while others may not work correctly with a particular emulator release.
Keep a record of the settings that work so you can restore them if an experiment causes problems.
Common Nintendo Switch Emulator Problems and Fixes
1. Emulator Does Not Open
Possible causes include missing dependencies, an incompatible Windows version, or a damaged download.
Possible solutions:
- Verify the downloaded archive.
- Check the official system requirements.
- Install the required dependencies.
- Update Windows.
- Download a fresh release from the verified project source.
2. Game Does Not Appear in the Library
This may happen when the emulator is scanning the wrong directory or does not support the file format.
Possible solutions:
- Confirm the correct game folder is selected.
- Check whether the format is supported.
- Refresh or rescan the library.
- Consult the emulator’s documentation.
3. Controller Is Not Working
Check whether Windows detects the controller first. Then review the emulator’s input settings and button mapping.
If you are using Bluetooth, test a wired connection to help identify whether the issue is related to pairing.
4. Low FPS or Stuttering
Performance can depend on CPU speed, GPU capability, available RAM, drivers, and game compatibility.
Possible solutions:
- Close unnecessary background applications.
- Update graphics drivers.
- Start with default graphics settings.
- Reduce resolution scaling.
- Check game-specific compatibility reports.
5. Black Screen or Graphical Errors
A black screen or rendering problem may be caused by an incompatible graphics backend, driver issue, or game-specific limitation.
Try restoring default graphics settings and checking the emulator’s official support documentation.
6. Shader Compilation Stutter
Some emulators compile shaders while a game is running. This can cause temporary stuttering, particularly during the first gameplay session.
Where supported, keep shader caching enabled and allow the emulator to build its cache naturally.
Tips for a Better Emulation Experience
For a more reliable setup, follow these recommendations:
- Keep the emulator updated using its legitimate release channel.
- Update your graphics drivers.
- Avoid changing multiple advanced settings simultaneously.
- Keep enough free storage space.
- Use a compatible controller.
- Read release notes before installing updates.
- Check game-specific compatibility information.
- Back up your configuration and save data where supported.
Is Setting Up a Nintendo Switch Emulator Legal?
Emulator software and copyrighted Nintendo content raise different legal questions. The rules can vary depending on your country and the specific software or activity involved.
An emulator does not automatically give you permission to download or distribute copyrighted games, firmware, encryption keys, or proprietary system files.
For responsible use:
- Obtain games through authorized channels.
- Use only system files you are legally entitled to use.
- Do not distribute unauthorized game copies.
- Do not share copyrighted firmware or encryption keys.
- Check the copyright and anti-circumvention laws that apply in your location.
Frequently Asked Questions
Can I set up a Nintendo Switch emulator on Windows 11?
Yes, some current emulator projects provide Windows 11-compatible builds. Check the official requirements for the specific release you plan to use.
Do I need a powerful PC for Nintendo Switch emulation?
A modern CPU, sufficient RAM, and a compatible GPU can help. The actual requirements depend on the emulator and game.
Can I use a keyboard instead of a controller?
Some emulators support keyboard input. However, controller support is useful for games designed around Nintendo Switch controls.
Why does my emulator show an empty game library?
The game directory may not be configured correctly, or the emulator may not recognize the files. Check the supported formats and library settings.
Should I use Vulkan or OpenGL?
There is no universal answer. The best option depends on your hardware, drivers, emulator, and game. Start with the recommended default.
Why does my game run slowly?
Slow performance can be caused by CPU or GPU limitations, graphics settings, background applications, drivers, or incomplete game compatibility.
Do emulators include Nintendo Switch games?
No. Emulator applications generally do not include copyrighted commercial games. You must obtain and use game content in accordance with applicable laws.
Can I improve graphics quality in an emulator?
Some projects provide resolution scaling, filtering, and other graphics options. Increasing visual quality can also increase hardware requirements.
Final Thoughts
Setting up a Nintendo Switch emulator on PC involves several steps, from checking hardware compatibility to configuring graphics and connecting a controller.
The most important thing is to begin with a legitimate emulator release, follow its official documentation, and use only system files and game backups that you are legally entitled to use.
Start with default settings, test your configuration, and make small adjustments only when necessary. This approach can help you identify problems without making your setup unnecessarily complicated.
Disclaimer: This article is for educational and informational purposes. SROMSNSP does not host or distribute copyrighted Nintendo games, firmware, encryption keys, or unauthorized software copies. Users are responsible for complying with applicable laws and software terms.
